Tutorials • ISPConfig
Modifying or adding a CNAME record in the ISPConfig administration panel.
In this tutorial, we will present the steps necessary to modify or add a CNAME record.
Views 976Updated 3 aniPublished on 22/11/2022by Florin P.
Introduction
- CNAME records are commonly used to associate a DNS record, such as www, with the domain that hosts the content of that record. This type of record is also useful when it is necessary to redirect records to external services, such as Shopify;
- As an example, for modifying a CNAME record, we will use the record shops.shopify.com, which we will associate with the www record of the domain shops.myshopify.com;
- In the first part of the article, we will present how to modify an existing CNAME record, and in the second part, we will show how to add a new record.
Requirements
- The ISPConfig panel administration data received in the email inbox associated with the Hostico account when the VPS was activated.
Steps
1. Modifying a CNAME Record
- First, we will connect to the ISPConfig control panel using one of the access addresses: https://SERVERNAME:10200 or https://SERVER_IP:10200 or https://DOMAIN.XX:10200
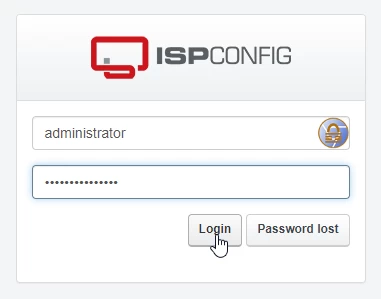
After logging in on the next page, click the DNS button in the upper menu of the page;

- We will search in the list that will be displayed for the domain we want to make changes to. To continue editing the records, we will click on the domain name;

- To modify, click on the row that contains the CNAME record;

- On this page, we modify the Target Hostname field in the current hostico.net record to shops.myshopify.com and click the Save button at the bottom;
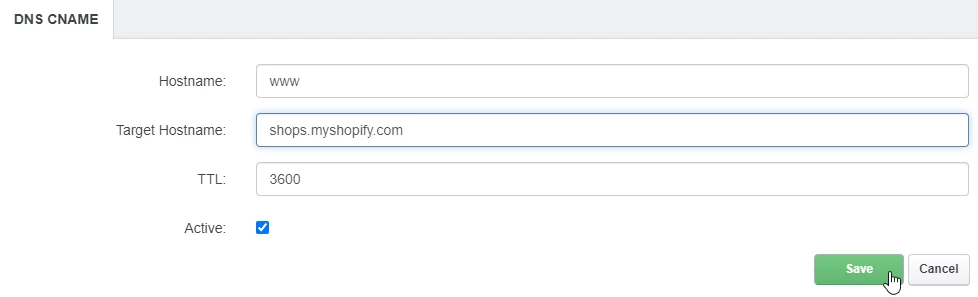
- From this point, the www registration will redirect to shops.myshopify.com
2.Adding a CNAME record.
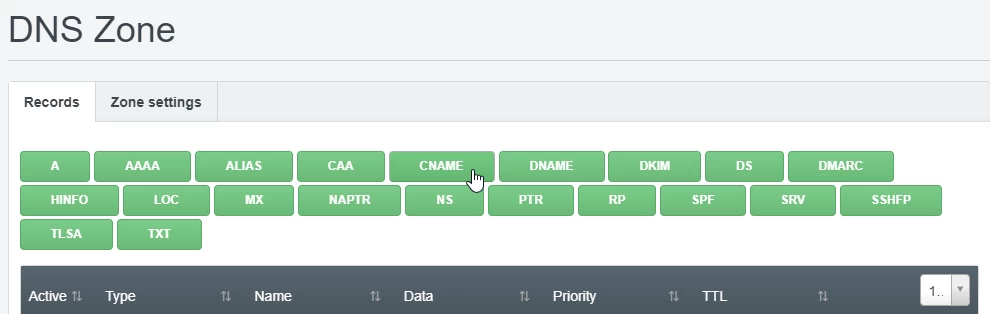
- To add a CNAME record, we return to the DNS zone, according to the instructions above, click the DNS button in the navigation bar, then click on the domain whose zone we want to modify;
- Next, we click on the top button named "CNAME";
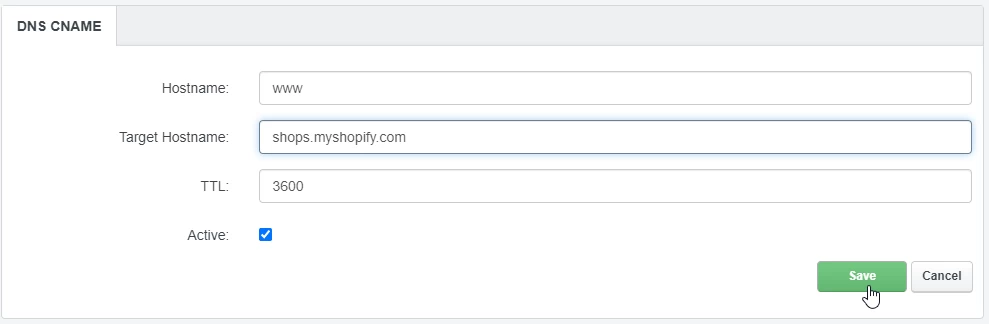
We add in the Hostname field, the CNAME record we are referring to, and in the Target Hostname field: the destination of the record (from where we want that CNAME to load). Next, we will click the Save button at the bottom of the form;
- Propagation of these records may take a few hours. We recommend clearing your browser's cache and/or your operating system's DNS cache before checking;
- DNS propagation is the time it takes for DNS changes to be updated on the internet.